
Use of the inventory tool: Sage Inventory Tools
This document describes how to implement and to use the inventory tool: Sage Inventory Tools.
As a reminder, the physical count list is the operation consisting in identifying on the ground, for a given location, the assets used by a company. It might be a first count, used to initialize the physical management process, or a control count, which makes it possible to update the information system of the enterprise by observing inputs, outputs and movements of assets.
Sage Inventory Tools is composed of two parts:
1/ The first one (desktop) is installed on a computer: it is the application used on the one hand to carry out the setup required to use a PDA-type mobile terminal (called Pocket PC below) as an inventory tool, and on the other hand to establish the connection with this Pocket PC:
- Pocket PC entry screen setup.
- Transfer to this Pocket PC of the files required to perform the count list (setup files, value tables and location references).
- Recovery of the location list and of the recorded asset list with their conversion destined to the software.
This application is multi-languages: English, French, Spanish, Portuguese and Italian.
2/ The second part, located on the Pocket PC, is used to carry out count lists, i.e. to gather the count information by scanning or entering the locations as well as the assets in the enterprise and by entering additional information about the assets (state, serial number, etc.) based on the setup on the PC.
Prerequisites
Technological environment
Operating System of the computer on which the desktop is installed:
Microsoft Windows XP 32-bit SP1a or SP2 or SP3
- Microsoft Windows Vista Business / Enterprise 32-bit / 64-bit
- Microsoft Windows 7 Entreprise 32-bit / 64-bitCertified Pocket PCs and compatible barcode scanner
- Symbol MC50
- Symbol MC9090K
- Symbol MC9090S
- Symbol PPT2700
- Motorola MC55A
- Honeywell D7800
- Honeywell D99EXOperating system and versionsof the Pocket PC
- Windows Mobile 2003 - 2005
- Windows Mobile 6Windows components necessary for the installation
The communication between the Pocket PC and the computer on which it must be connected is established thanks to a Microsoft utility that is different depending on the Windows version installed on the computer:
- Under Windows XP, it is utility ActiveSync.
- Under Windows Vista and Windows 7, it is "Windows Mobile Device Manager ".
This utility, which is vital to the application operation, must be installed. It can be downloaded for free from Microsoft website.Windows Mobile components necessary for the installation
The latest version of .NET Compact Framework must be installed on the mobile device.
Installation
- Launching the installation assistant (setup.exe) requires being connected with a Windows user having the administrator rights of the machine.
This assistant will guide you to achieve the installation of the Sage Inventory Tools solution desktop.
- The component installation is achieved by following the instructions given during the download.
Installation check
- Desktop installation :
Menu Sage / Sage Inventory Tools Count must appear in menu Start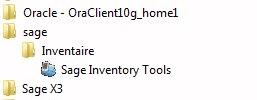
- Synchronisation utility installation :
1/ Windows XP version
- Icon ActiveSync must appear in the notification area of the task bar:

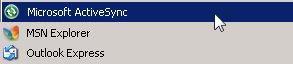
- In menu Start, menu "Microsoft ActiveSync"must be displayed:
2/ Windows Vista and Windows 7 version
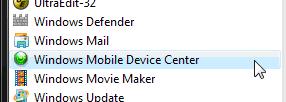
In menu Start, the "Windows Mobile Device Center " menu must be displayed:
Functional prerequisites
To complete the setup:
- The location and physical asset setup requires to indicate the control tables containing all possible values for the different fields to enter. These control tables must have been exported from the database of the application that manages them to a .par file or .inv file
To use the Pocket PC as an inventory tool:
It is necessary to:
- Install the program used to perform the count list on the Pocket PC.
This installation is carried out from the computer using menu Options / Peripheral unit installation.
- Launch this program on the Pocket PC at least once. Otherwise, a message will ask you to do so.
- There should also be a location file for .par and .inv files for the count list. This way, a database with the existing locations will be available on the Pocket PC when the count list is carried out. This file is obtained by export of the application database.
Desktop management
Setup
A minimum setup at location and physical assets information level is necessary to gather count information. This setup consists in:
- Defining the work language: the choice is done on screen Application options / TabUser interface.
- Defining the display and entry methods for the listed information.
- Associating, if need be, a value table to each of the pieces of information.
Upon accessing the setup for the first time, the value table list is not available. A message appears and proposes to load them from the file coming from the application database. Loading them is also possible via menu Setup / Value table load.
General principle
Upon first use of the product, the displayed information is that contained in two pre-entered default setup files, which are to be found locally on the Windows workstation (XMLParamLocDef.xml et XMLParamBienDef.xml).
When the setup has been personalized, the modifications are saved, either by validating a message upon exit from the screen or by action Save setup file, in setup files locally saved on the Windows workstation (XMLParamLoc.xml et XMLParamBien.xml). The default setup files, on the contrary, are never modified.
It is the information from these personalized setup files that are later on displayed upon opening the screen.
The location of these files is defined in screenOptions/Application options/Paths.
Notes:
- The information from the default pre-entered file can be displayed, if need be, with action Open default setup file.
- It is also possible to recover the setup file that exists on the Pocket PC via action: Read the peripheral unit configuration.
Once the setup has been completed, it is necessary to implement it on the Pocket PC so that it can be taken into account and used upon count list.
This action is performed either with buttonUpdate peripheral unit configuration or with menu: Action / Update peripheral unit configuration.
Location setup
Display order modification
The  and
and  arrows, located on the right side of the list, are used to modify the display order of the on-screen fields. Arrows have an impact on the current line.
Info title
This column displays the description that will appear on the location entry screen. This description can be modified.
Remanence
For each of the pieces of information, it is possible to specify whether the entered information must be transferred onto the next location upon count list.
Entry display
For each piece of information, it is possible to specify whether it will be:
- Displayed. It will be displayed in italic letters on the Pocket PC.
Or if the entry is:
- Optional. It will be displayed in black letters.
- Prohibited. It will not be displayed.
- Mandatory. A mandatory information will be displayed in red.
Default value
This column is used, for each piece of information, to enter a default value that will be assigned to it upon creation of a new location.
Value table
This column is used to associate a control table to each of the listed piece of information. When it is the case, the user will be able to enter only one of the values contained in the associated table and displayed in a drop-down list upon entry of the count list.
Update peripheral unit configuration.
This button is used to copy the location setup file onto the Pocket PC.
For the copy to succeed, the Pocket PC must be connected to the computer via utility "ActiveSync" (Windows XP) or "Windows Mobile Device Center" (Windows Vista or Windows 7).
This button is the equivalent of option Update peripheral unit configuration of menu Action.
A control on the setup of the following fields is carried out upon validating the screen: their entry is mandatory and a value table must be associated to them.
- Company
- Establishment
- Room
Physical asset setup
Display order modification
The and arrows, located on the right side of the list, are used to modify the display order of the on-screen fields. Arrows have an impact on the current line.
Info title
This column displays the description that will appear on the asset entry screen. This description can be modified.
Remanence
For each of the pieces of information, it is possible to specify whether the entered information must be transferred onto the next asset upon count list.
Entry display
For each piece of information, it is possible to specify whether it will be:
- Displayed. It will be displayed in italic letters on the Pocket PC.
Or if the entry is:
- Optional. It will be displayed in black letters.
- Prohibited. It will not be displayed.
- Mandatory. A mandatory information will be displayed in red.
Default value
This column is used, for each piece of information, to enter a default value that will be assigned to it upon creation of a new asset.
Value table
This column is used to associate a control table to each of the listed piece of information. When it is the case, the user will be able to enter only one of the values contained in the associated table and displayed in a drop-down list upon entry of the count list.
Update peripheral unit configuration.
This button is used to copy the setup file onto the Pocket PC.
For the copy to succeed, the Pocket PC must be connected to the computer via utility "ActiveSync" (Windows XP) or "Windows Mobile Device Center" (Windows Vista or Windows 7).
This button is the equivalent of option Update peripheral unit configuration of menu Action.
A control on the setup is carried out upon validating the screen: All information from the locations must be of type: Displayed and a value table must be associated to fields Company and Establishment.
Value table load
This action is used to load the value tables from the file coming from the application database.
Note: Loading them is also possible (by validating a message proposing the option) when selecting a Value table upon first access to the location or physical asset setup screen.
Action menu
This menu is only available when one of the setup screens is displayed. It proposes actions linked to the location or physical asset setup.
Action / Open default setup file
This action is used to open the location or physical asset default setup file (depending on the screen from which it is called).
Action / Open setup file
This action is used to open the location or asset setup file (depending on the screen from which it is called), which is to be found locally on the Windows workstation. It is in this file that the performed setup modifications are recorded (location file: XMLParamLoc.xml, and physical asset file: XMLParamBien.xml).
Action / Save setup file
This action is used to save the carried out modifications in the setup file.
If this action is not used, a message proposes to save the performed updates upon exit from the screen or upon Update of the peripheral unit configuration.
Action / Update peripheral unit configuration
This action, whose equivalent is a button with the same name and which is available in the setup screens, is used to copy the setup file onto the Pocket PC.
For the copy to succeed, the Pocket PC must be connected to the computer via utility "ActiveSync" (Windows XP) or "Windows Mobile Device Center" (Windows Vista or Windows 7).
Action / Read the peripheral unit configuration
This action is used to recover the setup file existing on the Pocket PC.
Transfer menu
Process of PC files to mobile peripheral unit
This screen is used to copy the data files onto the Pocket PC. To do so:
- the Pocket PC must be connected to the computer via utility "ActiveSync" (Windows XP) or "Windows Mobile Device Center" (Windows Vista or Windows 7),
- application Inventory on the Pocket PC must be closed.
- The Location copy button opens a window used to select the location file from the database of the application that manages physical elements.
Once selected, the file is processed (converted into a DataLoc.xml file) and then directly sent to the Pocket PC.
Note: if the device already contains a non-recovered location file, an information message is displayed to validate its replacement. - The Value table copy button opens a window used to select the file containing the value tables. This file comes from the database of the application that manages physical assets.
Once selected, the file is processed (converted into a TabVal.xml file) and then directly sent to the Pocket PC.
The copied files are initialized upon starting the application on the peripheral unit. If the peripheral unit is already connected upon transfer, it is necessary to re-launch the application to access the file information.
Process of peripheral unit files to PC
The location and physical asset recovery functions can only be used if the Pocket PC is connected to the computer via utility "ActiveSync" (Windows XP) or "Windows Mobile Device Center" (Windows Vista or Windows 7).
It is also necessary to exit application Inventory on the Pocket PC.
- The Location recovery button is used to recover the location file from the count depending on the following methods:
- If at Options / Tab Output file setup level the location file automatic name generation has not been selected, a window is displayed so that the file name and location can be entered.
- If option Delete accents is activated, all accents are deleted upon file generation.
- If option Delete locationsof the mobile peripheral unit after transfer is activated, the location file is deleted from the Pocket PC after being transferred.
- The Physical asset recovery button is used to recover the physical asset file from the count depending on the following methods:
- If at Options / Tab Output file setup level the physical asset file automatic name generation has not been selected, a window is displayed so that the file name and location can be entered.
- If option Delete accents is activated, all accents are deleted upon file generation.
- If option Delete physical assetsof the mobile peripheral unit after transfer is activated, the physical asset file is deleted from the Pocket PC after being transferred.
So, the recovered files are recorded in the Export file folder, specified in the path set up at application Options level.
Options menu
Application options
This screen is used to modify the Sage Inventory Tools application options on the computer. It contains the 3 following tabs:
Tab User interface
- A field is used to select the application interface language.
- When activated, a checkbox is used to have the exit from an application validated by means of a confirmation window.
TabPaths
This tab is used to specify the location:
- Of the description files for the location and physical asset entry screens
These files, resulting from the carried out setup, are generated in .xml format to the Pocket PC.
- Of the application work folder: Directory where the user can find the application temporary files as well as the files used by the inventory application, such as the files containing the control tables of the information other than the information specific to the count:
- Of the export file directory
TabOutput file setup
This tab is used to create naming rules for the location and physical files, that are expected by the count management application, and generated upon transfer process of the files from the Pocket PC to the computer.
- When checkbox Automatically generate file name is activated, the file name syntax will result from the carried out setup on this tab; otherwise, a window will be displayed at the end of the transfer process for the file name and location to be entered.
- The file name is made of:
- a prefix
- a sequence number counter whose start value and length are to be entered.
The Complete with zeros indicator is used to complete the obtained counter value with zeros on the left, in the set up length.
- the file extension.
If the extension is: .xml, the export files will keep the .xml format.
Example of a location file setup
Prefix: LOCAL
Sequence number counter: 2
Counter length: 3
Complete with zeros: box activated
Extension: loc
Obtained file: LOCAL002.loc
Example of an asset file setup
Prefix: PHY
Sequence number counter: 9
Counter length: 3
Complete with zeros: box activated
Extension: inv
Obtained file: PHY009.inv
Peripheral unit options
On the condition that the Pocket PC is connected to the computer, this screen is used to access and modiffy all Pocket PC setup options recorded in the Pocket PC registry base.
The reading and the display of the existing setup is carried out via button Read peripheral unit configuration.
It is then possible to modify it (except for the location of the entry screen and work directory description files that is displayed on tab Paths), and to transfer it to the Pocket PC via button Apply.
Note: this setup can also be carried out directly on the Pocket PC, from menu Options.
Tab Application:
This tab shows the Pocket PC use options list.
- Choose language of the Pocket PC user interface
- Exit application validation: when this option is activated, a confirmation message will systematically be displayed upon application exit.
- On-the-fly location capture: when this option is activated, the locations are listed one after another without having to validate the entry between each list; otherwise, each location list must be validated.
- On-the-fly asset capture: when this option is activated, the assets are listed one after another without having to validate the entry between each list; otherwise, each list must be validated.
Tab Paths:
This tab displays the location, in the Pocket PC registry base, of the entry screen description files, as well as the location of the work directory. Modifying this information is prohibited in this tab; it has to be done at Pocket PC Options menu level.
TabSystem:
This tab is used to view/modify the system parameters.
Tab Bar codes
In this tab, it is possible to specify whether a control must be carried out on location and/or asset bar codes; in that case, the user must specify:
- The format:
- Alphanumeric
- Numeric
- The length.
Peripheral unit installation
This screen displays the list of Pocket PC which can operate with the inventory tool.
It is used to select the type of Pocket PC the user wants to install.
- The top row shows the Pocket PC running with Windows Mobile 5.
- The next row shows those operating with Windows Mobile 6.5 .
- The Other type is to be used when the reading of the bar codes is not managed (the bar codes must be entered manually). This version works with all mobile terminals working under Windows Mobile (including telephones and tablets).
Pocket PC management
After installing the application Stock count and starting it from the first time on the Pocket PC, it is necessary to have proceeded to the transfer of the files of the PC to the Pocket PC (copy of locations and value tables).
Upon starting, a window appears and displays the progress bar of the application loading.
Once the load is completed, a screen displays the main menu:
- Locations
- Physical assets
- Options
Once the count is over, it is necessary to recover the counted locations and physical assets on the computer. This copy is to be performed on the computer, from menu Transfer / Peripheral unit files process to PC.
Location menu
The location menu is used to acces sub-menus:
- See configuration: displays the location setup, carried out on the computer. This setup cannot be modified. This setup cannot be modified.
- Physical stock count: a table shows the locations from the application as well as the counted ones if there is any. A mere click in a line displays a contextual menu:
- view: to access the entry/modification screen of the location data
delete: to delete a location
The delete of localizations from the stock count is prohibited under Windows.
A location can be added after the activation of the button '+' and a count of the bar codes.
The location entry screen is then displayed to enter the location information. The value lists cannot be modified, except for the room list.
A room that is not in the list nor in the building can be entered by clicking on the Edit button after selecting the field with the stylus. A window appears and shows the field to be entered as well as a screen keyboard.
The Cancelbutton is used to cancel the entry or modification of the current location.
The Validatebutton is used to save the modifications or creations. Upon validation, a check is carried out on the fields whose entry is set up at location configuration level as being mandatory (the fields are displayed in red). If one of them is not entered, a warning message appears and blocks the validation.
Asset menu
The physical asset menu is used to access sub-menus:
- See configuration: displays the asset setup, carried out on the computer. This setup cannot be modified.
- Physical stock count: a table shows the assets that have already been counted. A mere click in a line displays a contextual menu:
- view: to access the entry/modification screen of the asset data
- delete: to delete an asset.
To add an asset:
Upon first entry in the screen after starting it, it is necessary to enter the current location (by scanning or entering it). Otherwise, a warning message is displayed.
The entry of this location is performed in a specific window that can be reached by clicking on button Location choice, and in which it is necessary to enter either the room bar code registration number or the room code.
Once the current location is entered, it is possible to carry out the physical asset list (or entry).
The addition of an asset can be performed after activating the + button and scanning a bar code.
The asset entry screen is displayed so that its identification information can be entered. The value lists cannot be modified.
The value of a field that is not controlled by a value table can be entered by clicking on button Edit after selecting the field with the stylus. A window appears and shows the field to be entered as well as a screen keyboard.
The Cancelbutton is used to cancel the entry or modification of the current asset.
The Validatebutton is used to save the modifications or creations. Upon validation, a check is carried out on the fields whose entry is set up at asset configuration level as being mandatory (the fields are displayed in red). If one of them is not entered, a warning message appears and blocks the validation.
Options menu
The Options menu is used to modify the Pocket PC options, which might have been previously set up on the computer (Options menu/ Peripheral unit options). See above the description of these options.